
Requirements
- PrestaShop 1.7.x or 8.x
- PHP 7.2 or higher
- Access to the Back Office with module management permissions
Upload & install
1. Download the module package blockslidingcart.zip from your account.
2. In the Back Office, go to Modules → Module Manager.
3. Click the Upload a module button in the top-right corner.
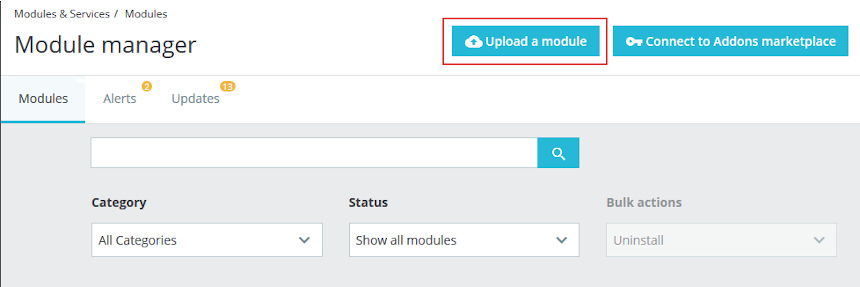
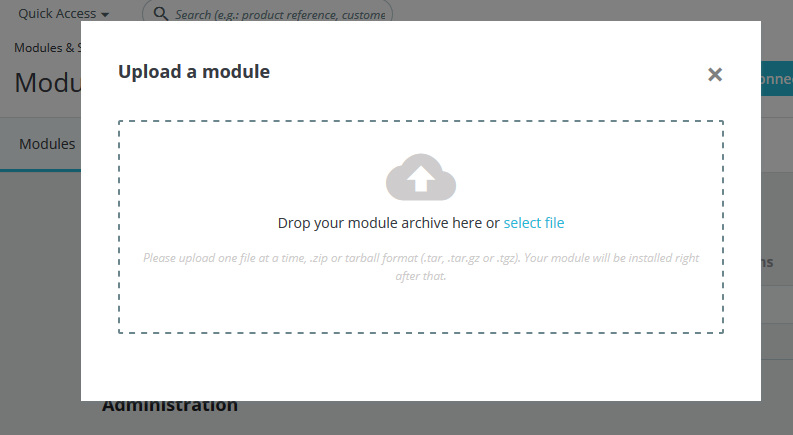
4. Drag and drop blockslidingcart.zip into the upload area, or click to browse and select the file.
5. PrestaShop will install the module automatically. Once complete, click Configure to open the settings page.
Updating from a previous version
To update an existing installation:
- Upload the new blockslidingcart.zip using the same steps above. PrestaShop will detect the existing module and upgrade it automatically.
- Your settings will be preserved. New options added in the update will use their default values.
- Clear your browser cache and PrestaShop cache (Advanced Parameters → Performance → Clear cache) to ensure updated CSS/JS files are loaded.
Uninstallation
- Go to Modules → Module Manager.
- Find Block Sliding Cart in the list.
- Click the dropdown arrow next to the Configure button and select Uninstall.
- Confirm the action. All module settings will be removed from the database.
Troubleshooting
- Cart not appearing? Make sure the module is hooked to
displayHeaderanddisplayNav. Go to Design → Positions to verify. - Styles look broken? Clear your browser cache and PrestaShop cache. Some themes may require minor CSS adjustments.
- Conflicts with other cart modules? Disable other cart-related modules (e.g. default Shopping cart block) to avoid conflicts.